Want to know how to operate the Wondershare Filmora video editor for Windows and Mac devices? Go through this detailed breakdown and use it.
Table of Contents
Introduction
From professional video production work to casual usage of small-scale video edits, having one right video editing tool that suits the needs of all user types is valuable. On that note, Wondershare Filmora is a top-grade option among all the free video editing software.
With this desktop-based software, you would get many features for dynamic video editing work, starting with standard cropping/splitting/merging to intuitive AI-based features. The usage method of this video editor is simplistic here as well, but how exactly does it work?
Let’s get into that in this guide.
Preparation for download and installation of Filmora
To note, the downloading and installation process of this video editor software for Windows and Mac is not that challenging. However, you need to consider the tech specifics before beginning the process.
Check the specific prerequisites below:
- Supported operating system– On Windows, it is compatible with Windows 11 (64-bit)/10/8.1/7. Mac users can install it on macOS v.10.14 (Mojave)/v10.15 (Catalina)/v11 (Big Sur)/v12 (Monterey).
- RAM– At least 4 GB of RAM support is needed. If you want to edit videos with HD/4K resolution, 8 GB RAM is needed. The latter is the standard for Mac devices, with 16 GB RAM necessary for HD/4K support.
- Processor– Windows (Intel i5 and higher) and Mac (Intel i3 and higher) with 2GHz+. For HD/4K videos, Intel 6th Generation and an updated CPU are needed. For Mac users, the latter should have Apple M1 chip compatibility.
- Disk– 10 GB of free storage space needed for installation in the device and SSD support for HD/4K video editing.
A detailed look at the process and features
Now that you meet the necessary requirements for the software, you can download Filmora video editor from the official website and install it on your PC or Mac. Follow all directions for installation. Then, let’s get started on how to edit with Wondershare Filmora.
1. Launching the software- Interface specifications
The initial home screen is straightforward in design but easily navigable. Click the aspect ratio dropdown menu to select the 9:16 aspect ratio or other types you want for your video.
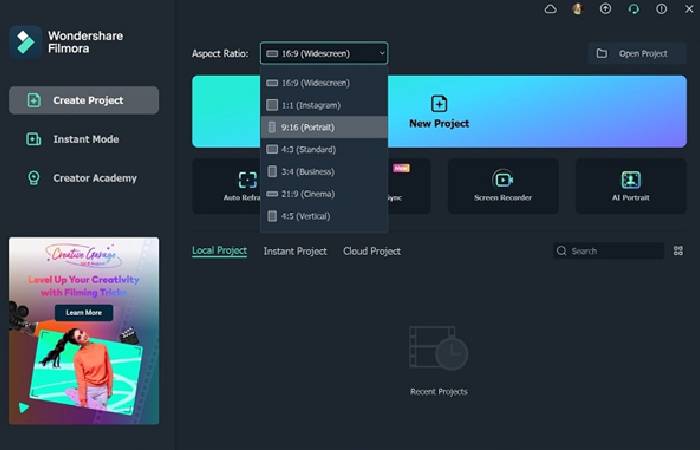
Click on New Project to start video editing work for the first time. Users can access previously edited files under the Local Project section, the ones made with Instant Mode (see the side pane) under Instant Project, and cloud-saved videos under Cloud Project.
Advanced features like Instant Mode, AI Portrait, Screen Recorder, and Auto Beat Sync are available on the main interface. For example, click on Instant Mode to get multiple preset templates for quick AI-controlled video edits. This is highly suitable for total beginners who lack technical design skills.

2. Import the media file
After clicking the New Project module, the main editor interface will open. Press the “Click here to import media” icon to add your file(s) from the internal device storage folder.
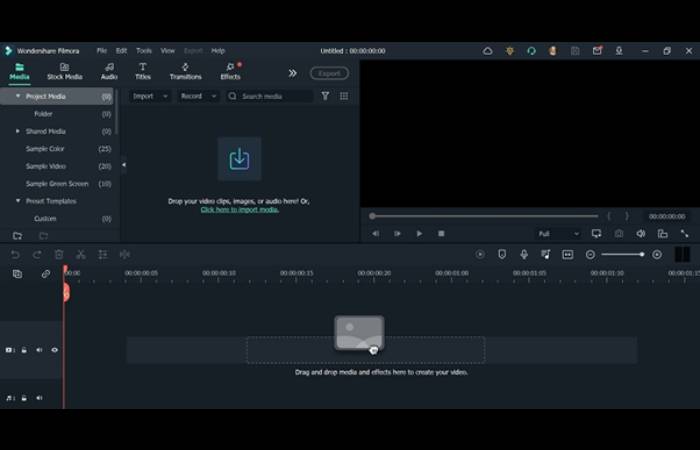
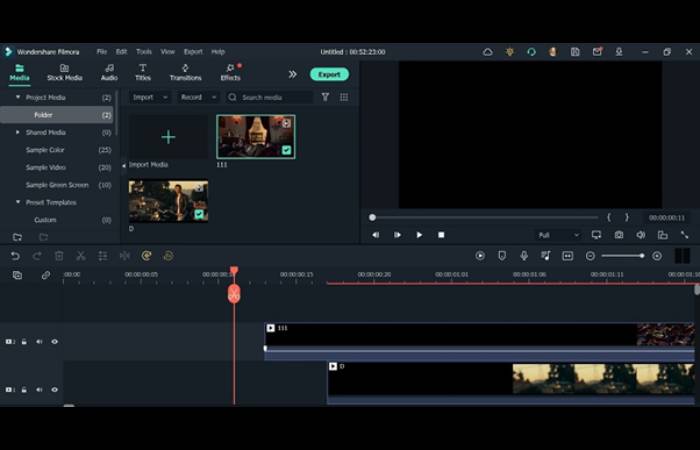
After adding the file, you can drag it to the editor timeline below. This is where you will crop videos, add speed, motion tracking, effects, and make other changes. Filmora allows multi-file editing; you can drag another file (video/audio) into the timeline.
3. Start fundamental-level edits
After adding the file, you can perform the standard editing work. Tools are available just above the editing timeline where you dragged the files. Choose the added clip, hover on top of the ones you want to try, and click.
![]()
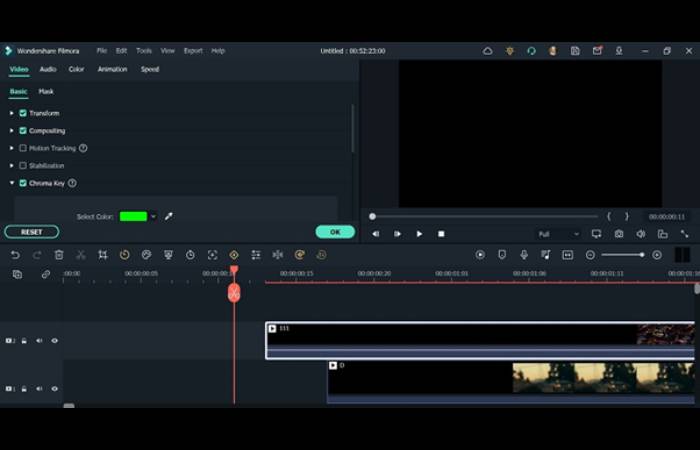
You can crop the file, delete sections, remove background from video files with the Chroma Key tool, and adjust speed, among others.
4. Continue with advanced edits
After completing the general editing work, you can opt for the more advanced functions. Color correction is possible through this device. Click on the Color Correction icon from the taskbar or right-click on the video > Color Correction.

You can click on the tabs at the top ribbon bar for further advanced benefits, like Titles, Transitions, and Stock Media. For example, Wondershare Filmora provides stock images from sites like Pixabay and GIPHY and even supports Filmstock.
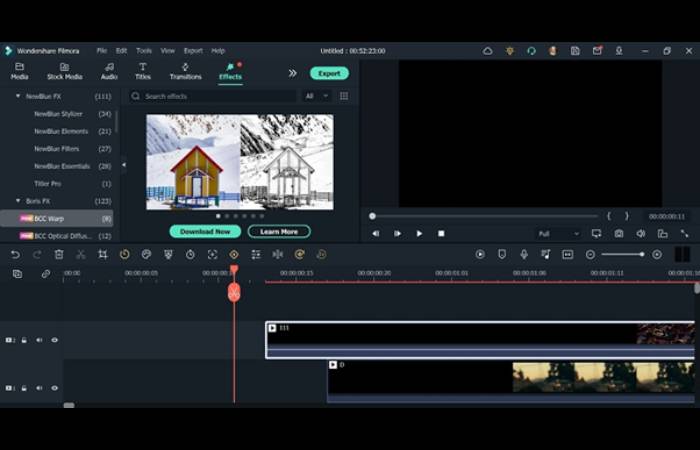
Further, click on the Effects tab to access the OpenFX plugins this Windows video editor supports, like NewBlue FX and Boris FX. These preset effects optimize the video quality during editing with different looks and styles.
5. Audio editing
It is possible to add audio to the video with Filmora as well. Filmora has many audio editing functions, including AI-powered Audio Visualization and Auto Beat Sync, to accurately align sound with the video.
Other notable functions here include Silence Detection, where the software carefully checks the video for any long stretches of muted sound. It automatically finds the sections and deletes the part from the video.
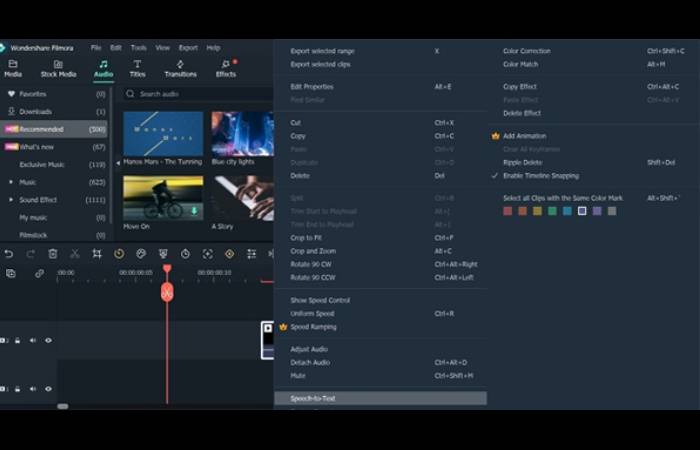
Besides that, you can also use the audio-to-text converter function in Filmora to add subtitles to your file. Right-click on the file you added to your timeline, and then you should tap Speech-to-Text. Then, set the section of the clip to transform the language and enable the automatic transcription feature.
6. Export options
After completing the editing work, you can export the file by clicking the Export button at the top of the screen. Filmora supports various formats for audio and video during import/export. You should choose the Local tab and select the preferred format from the list for direct file downloading.
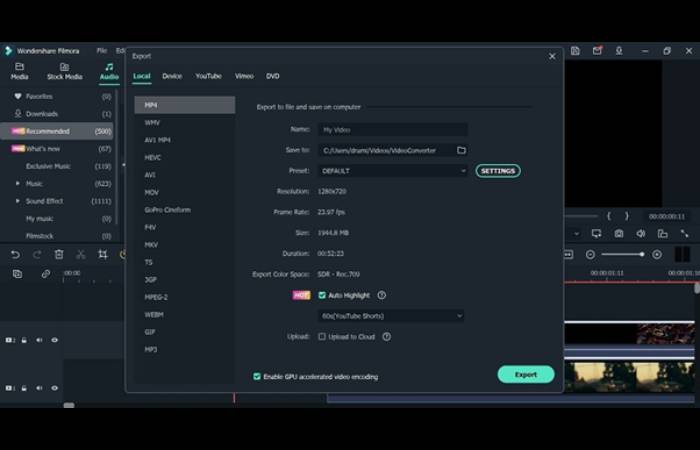
Make further changes to the video settings and press the Export button to download it. Besides this, you can also link your Vimeo and YouTube accounts for instant posting.
Conclusion
Editing videos on Wondershare Filmora is not complex, and users will notice a high learning curve. Follow all the steps carefully and try out many combinations of effects, filters, and other edits to create suitable videos for your use.

![A Detailed Review on Wondershare Filmora [2024]](https://www.computertechreviews.com/wp-content/uploads/2022/12/A-Detailed-Review-on-Wondershare-Filmora-All-You-Want-to-Know-1200x675.jpg)