When it comes to create a custom sitemap for an ecommerce website, Shopify is one of the best CMS platforms to get started with. However, the Shopify sitemap is beneficial for users because it is meant for search engines that crawl and index the site. Also, it makes it easier for Google to discover your site from millions and rank your content on the top of search pages.
In this article, we will cover all the important elements you need to know before diving into a custom sitemap generator. So, let’s start with the basics.
Table of Contents
What Is Shopify Sitemap?
Shopify Sitemap allows the search engines to locate your Website from millions of addresses. It automatically generates content that includes links to various pages such as blogs, about us, categories, products, and marketing pages. The recent Shopify custom sitemap generator updates that now Shopify customers can edit the Robot.txt file.
However, this still has limitations for some cases since you do not create a new sitemap on the CMS. In this context, we will show you how to create a Shopify sitemap XML file later.
But before that, it is essential to find default Shopify sitemaps and why you need them.
Let’s dive!
What is included in Shopify XML Sitemap?
The XML sitemap of your Website includes various links. These can be categorized in two ways, such as child sitemaps, and broken down into several pages.
This mostly contains four different child sitemaps-
- Product pages
- Collection pages
- Blogs
- Other marketing pages
With these four categories, one can easily understand the selection of pages and what type of content is indexed. Of course, once your sitemap reaches 5000 URLs, the additional sitemap will be created.
How to find the default Shopify sitemap?
You can find the default Shopify sitemap by simply using the command-
example.com/sitemap.xml.
Once you locate the sitemap, you will be able to find whole pages that are indexed. In addition, the sitemap URL is also referenced in Shopify’s Robot.txt file, which Shopify allows you to make edits.
You can upload the default XML sitemap to the webmaster to check if the pages are indexed correctly or not.
Reasons You Should Add or Create Shopify Sitemap
- It can be used to aid process redirects and eliminate old URLs from the index if you want to migrate your site or alter URL structure.
- It can be beneficial to condense your website elements since old URLs are included in the sitemap to aid Google in processing redirection and removing those URLs from indexed.
- Hreflang sitemaps might be uploaded using this way (since these will not appear in the Robot.txt file).
- Your site has product versions and has personalized your Shopify CMS. The product versions are not included in the Shopify sitemap. Resultant, you can include them in the sitemap.
Step-By-Step Guide To Create Shopify XML Sitemap Online
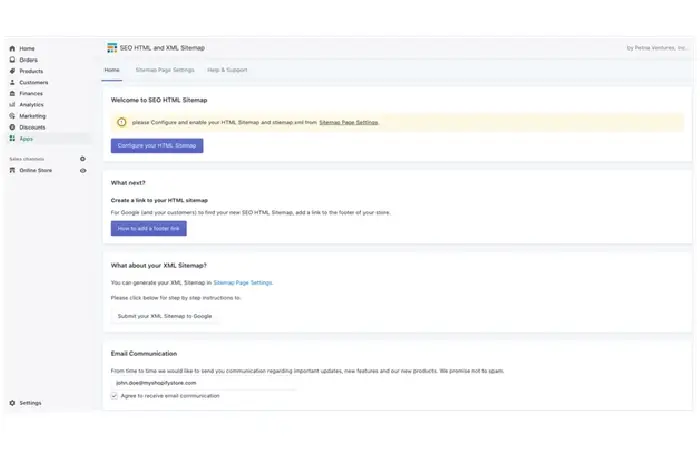
Step 1- Launch the Shopify dashboard and choose Apps then SEO HTML and XML sitemap option. The following window will open to configure your XML sitemap.
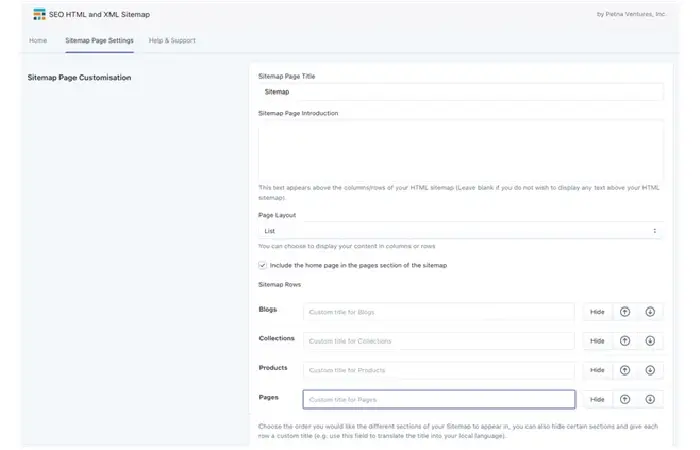
Step 2- Go to Sitemap Page Settings menu and navigate to enable Sitemap option.
Step 3- Click on Enable to enable your sitemap. Now your sitemap is automatically created. You will see the url your sitemap will be displayed at. If you want, you can add this URL to your site footer. Your sitemap will be automatically updated if you make any changes to products, collections, blogs or pages.
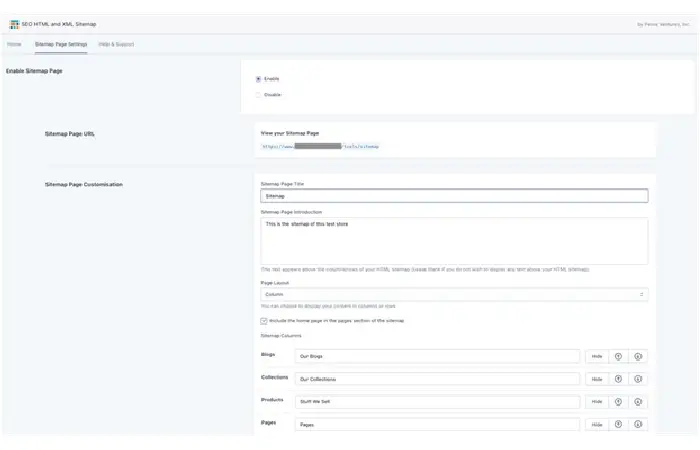
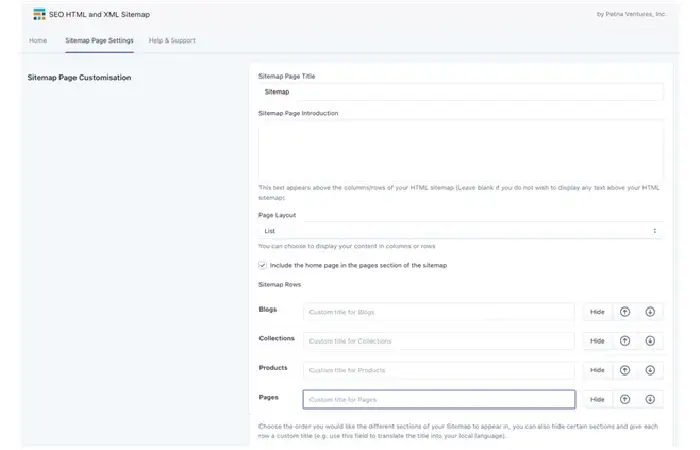
Step 4- In Sitemap Page Customization section you can define the title of your sitemap, write a short intro, choose a column or row layout option, and define titles for each section (blogs, collections, products, pages) and you can define the order of appearance of each section.
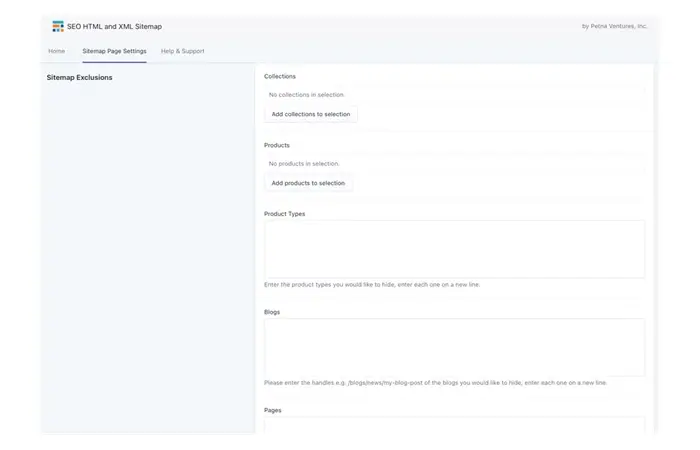
Step 5- Under Sitemap Exclusions section, if you want, you can exclude specific Collections, Products, Product Types, Blogs or Pages from appearing on your sitemap.
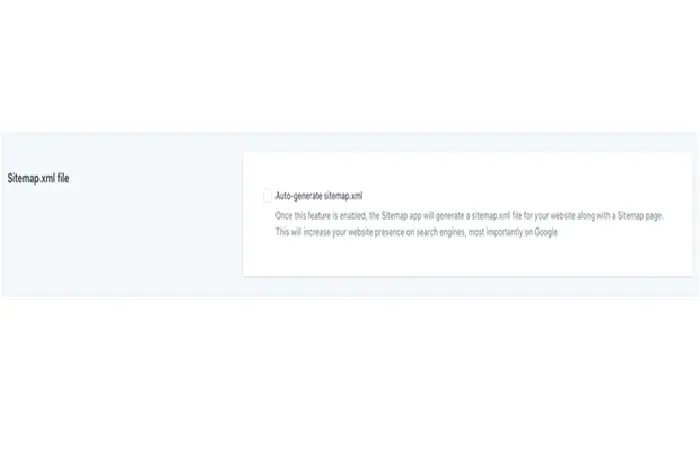
Step 6- Under Sitemap.xml section, if you click Auto-generate sitemap.xml box, an XML version of your sitemap will be automatically created and you can view this at the URL provided in this section. You should submit this XML to your Google Console.
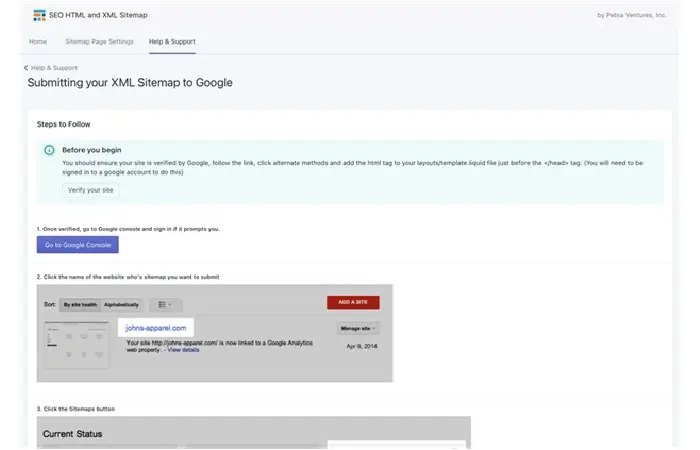
Step 7- Refer to Help & Support menu if you need step-by-step instructions to place your HTML Sitemap link to your footer or submit XML Sitemap to Google Console.
How To Verify Your Shopify Site With Google?
Before submitting the sitemap, ensure your site is verified with Google. Here’s how you can do this.
Step 1- Start your Google Search Console Account and click add property option from the drop-down menu.
Step 2- On the select URL option; add the site address you want to add a property with.
Step 3- Tap on continue.
Step 4- You will come to the verification window, and here you need to choose the HTML tag. If you know other methods of verification of your site, then choose your preferred option.
Step 5- If you choose an HTML tag, you will find an HTML tag that you need to copy.
Step 6- Go to Shopify’s dashboard >> online store >> Themes.
Step 7- Select the theme you want to edit and then tap on actions, then edit codes.
Step 8- Choose a theme.liquid here and paste that code below the Head tag.
Step 9– Click on the Save button, and your site is verified.
The verified site message appears on the search console, and you’re good to go.
Final Verdict
Congratulations! You’ve successfully learned how to create, submit and verify custom XML sitemaps with Shopify. We recommend you to follow the given steps carefully, and you do not need an expert for this. Good Luck!

